You’ve been staring at that dusty attic hatch for years. It’s full of holiday boxes and bad ideas. What if you could turn that wasted space into a cozy bedroom, a quiet office, or a proper hangout without pushing out the walls or buying a bigger house?
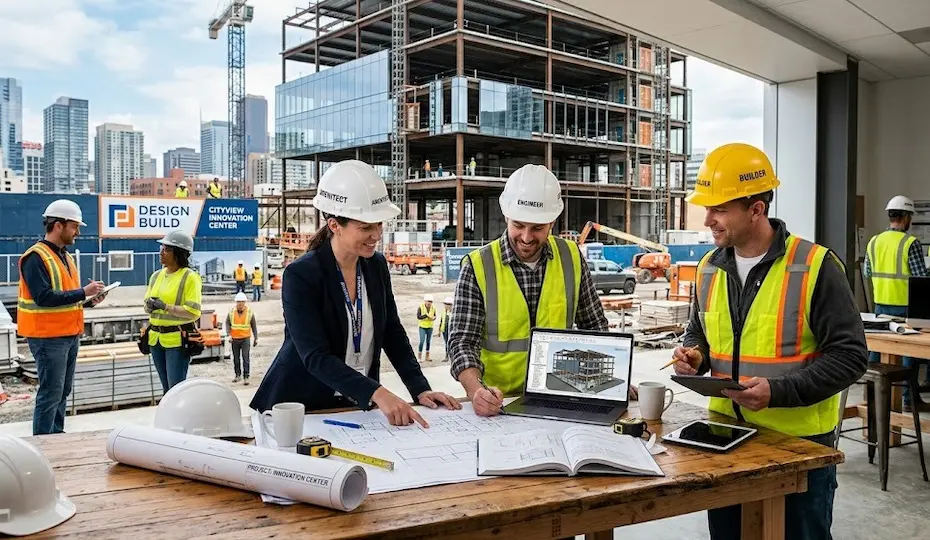
This guide will provide insights on how to know if your attic can be finished, the steps of drafting and permitting, costs that actually make sense, common mistakes, and the practical stuff contractors, engineers, architects, and designers care about. Let’s get to it. Navigating the legal side can be tricky, so check out our guide to construction documents to see what paperwork you’ll need for an attic remodel.
You don’t need more square footage outside the house; you probably have it above your head. A finished attic can add usable rooms, storage, and resale value. But do it right: measure, draft, get permits, and coordinate structure and systems. Make that doable by following this guide!
First, Get What a Finished Attic Is.
A finished attic is an attic made safe and livable: walls, flooring, insulation, heating/cooling, legal egress, and electrical. It’s not just cleaned-up storage; however, it’s a space you can sleep, work, and live in comfortably.
Why Finishing an Attic Is a Smart Home Upgrade
Extra living space without an addition, usually lower cost than building out, and it can boost the comfort and resale value of your property. Also, you can ensure less disruption outside without a new foundation by opting for a finished attic.
Inspiring Finished Attic Ideas
You can go with bedrooms and guest suites, quiet home offices, playrooms, libraries, media rooms, or multi-purpose rooms with smart storage built under sloped ceilings. Whatever you consider, the attic’s angles become character if you design for them correctly.
How To Determine Is Your Attic Is Suitable for Finishing?
Check…
- Ceiling height & usable floor area
- Structural floor load
- Safe stairs and emergency egress
- Ventilation and insulation space
If you can’t tick these, plan for upgrades.
US Local Building Codes You Must Consider
Codes vary by jurisdiction, but these items are common and strict:
- Minimum ceiling heights
- Emergency escape openings
- Stairs
- Smoke detectors
- Insulation/energy
The 2024 IRC and ICC guidance set clear minimums for habitable attic spaces. Check local code early and design to it.
Structural & Floor-Load Considerations
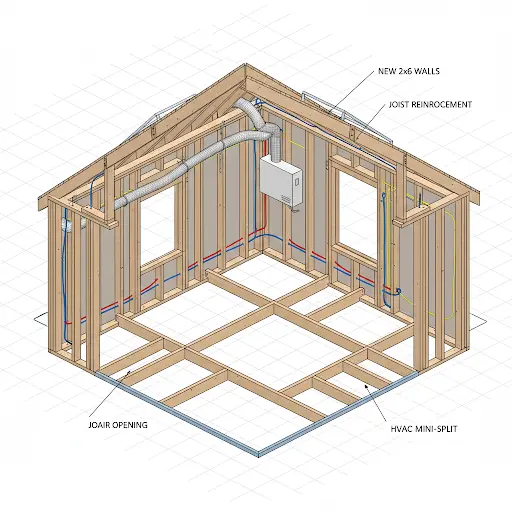
Think of the attic floor as the stage for people and furniture. An attic originally meant for storage may have joists sized for light loads (say, 10–20 psf). Living spaces require higher live loads, often 30–40 psf or more, and that often means sistering joists or adding new floor framing and load paths to foundations. Have an engineer check the existing framing and nail down exactly what reinforcement is needed before you order drywall.
Stair, Access, & Egress Rules
Most codes require safe, fixed stair access for habitable attics (not a ladder) and a legally sized emergency escape (window or door) from sleeping rooms. Clear headroom, tread dimensions, and guard rails are permit checks. If you need a new stair, plan the layout early because it affects floor framing and the layout downstairs.
HVAC, Ventilation, & Insulation
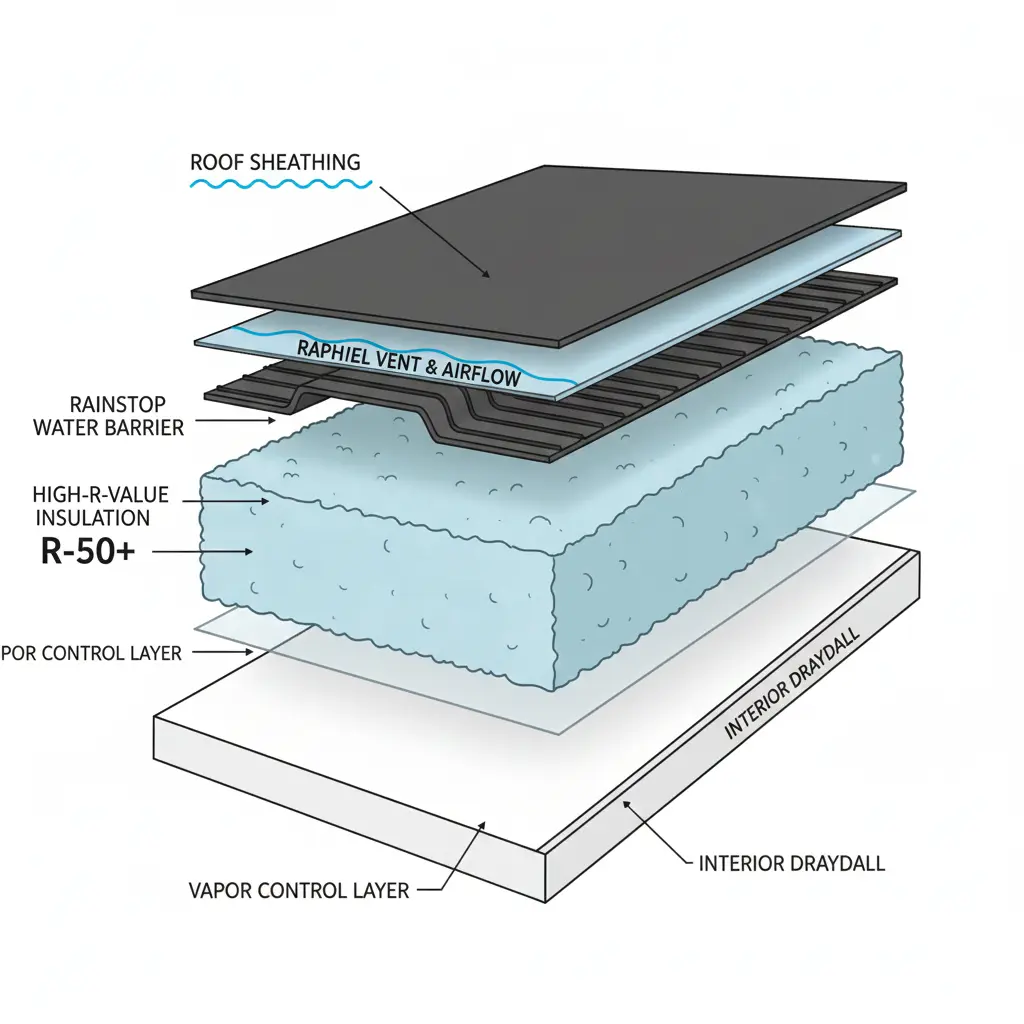
Attics get hot in summer and cold in winter unless you manage them. That means two things:
- Envelope control (insulation and air sealing)
- Mechanical systems (heat/cool and ventilation).
What Is The Best Insulation R-value?
Typical recommendations for ceilings/attics are R-30 to R-49, depending on climate zone; walls usually R-13–R-23. Pick insulation and thickness to meet local energy code and comfort goals.
Ventilation
Continuous airflow via soffit plus ridge vents or dedicated rafter vents helps prevent moisture and ice dams. Finished attics need attic-vent strategies that don’t get blocked by insulation. A rule-of-thumb used by professionals: 1 sq ft of ventilation per 150 sq ft of attic area (adjusted for balanced intake/exhaust).
HVAC Options
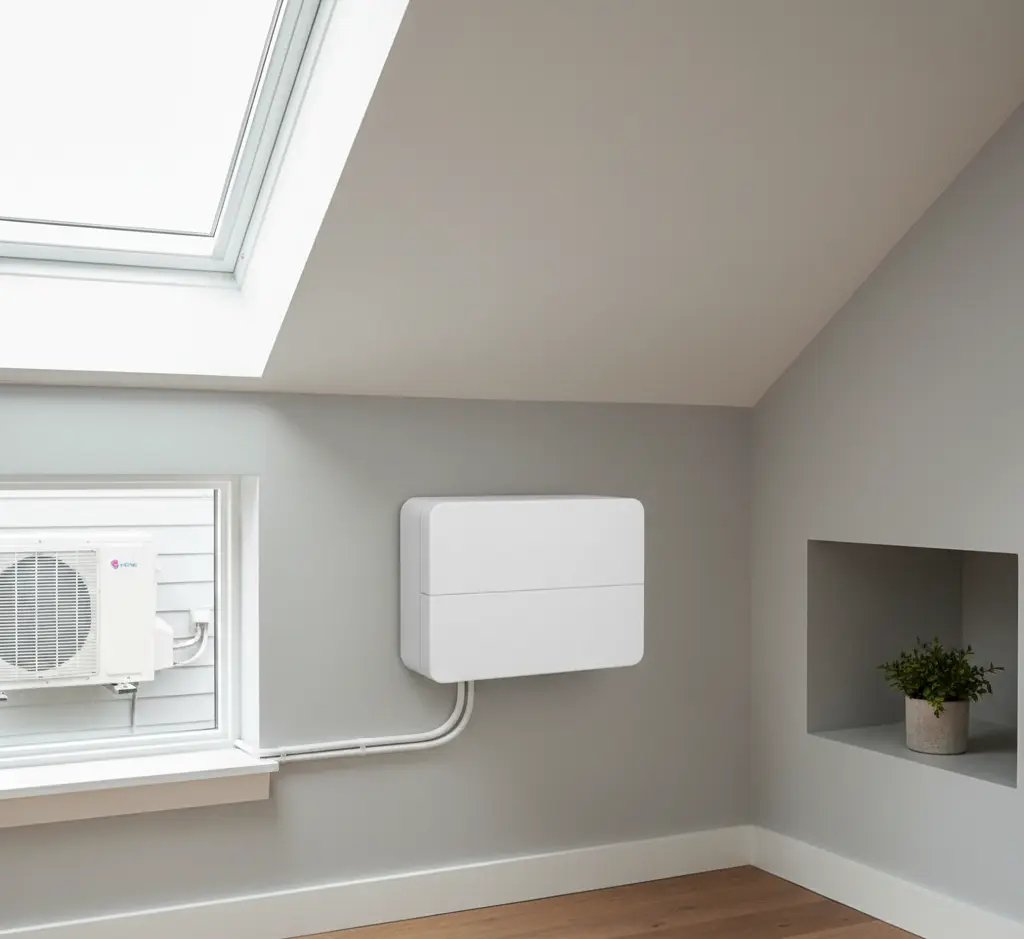
Extend existing HVAC with zoning (best when ducts and load allow), add a mini-split for targeted heating/cooling (low-install downtime), or add a small ducted solution. Mini-splits are commonly chosen for finished attics because they avoid major ductwork.
Moisture control
Air sealing and vapor strategies matter as vented attics behave differently from conditioned attics. Finish plans must match whether the attic will be conditioned (inside the thermal envelope) or remain vented (thermal envelope below).
All About Electrical, Service Panel, & Plumbing Readiness
A finished attic needs code-compliant circuits, lighting, outlets, smoke/CO detection, and perhaps plumbing if you add a bath. Check the service panel early, as many older homes have full panels that need upgrades to support new loads. Also plan cable/low-voltage routes for internet and AV; routing is easiest during framing.Managing these technical systems can be complex, so it’s helpful to understand what MEP means in construction and how it ensures your attic’s utilities are safe and efficient.
The Step-by-Step Finished Attic Blueprint
This is the practical sequence contractors and drafters use.
Step 1: Get Precise Measurements (as-builts)
Measure existing framing, pitches, dormers, and utilities. Take photos. Accurate as-builts prevent redesigns mid-project.
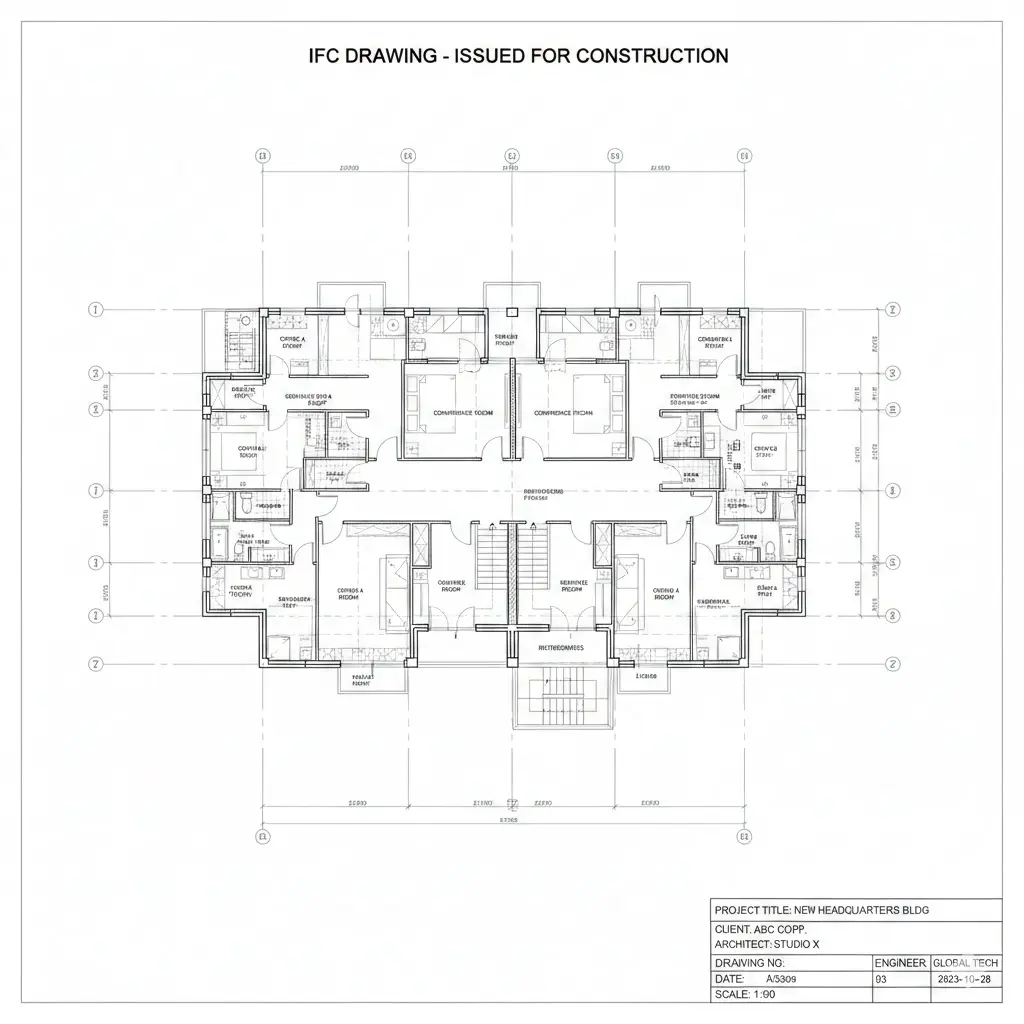
Step 2: Conduct Professional Drafting & Design (2D Plans + 3D Models)
Create permit-ready plans, roof/dormer details, floor framing reinforcement drawings, and 3D views so clients understand how sloped ceilings affect usable area. BIM or Revit models help with clashes for HVAC and electrical.Using 3D architectural rendering helps clients visualize how sloped ceilings will feel in reality.
Step 3: Get Permits & Approvals
Submit plans to the local permit office. Expect questions on stairs, egress, insulation, structural load, and fire separation.
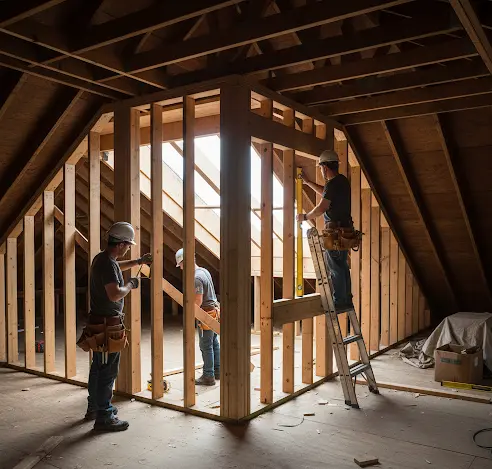
Step 4: Work On Infrastructure Rough-ins
Reinforce floor, rough-in stairs and framing, run HVAC, electrical, and plumbing. Coordinate with engineers for load transfers.
Step 5: Focus On Insulation & Drywall
Install proper insulation and vapor control, then drywall and finishes. Pay attention to ventilation and soffit/ridge paths during insulation.
Step 6: Last Comes Final Trim, Fixtures, Test & Inspections
Finish lighting, controls, HVAC balancing, and obtain final inspections and certificate of occupancy if needed.
What Is The Finished Attic Cost In The US?
Costs vary widely by scope, region, and finish level. Here are the ranges professionals quote, and what changes the number.
- Basic storage/insulation upgrade: $5–20 per sq ft (very basic).
- Standard living-space finish (no plumbing): $30–$150 per sq ft, depending on finishes, structural work, and HVAC.
- Full conversion with bathroom and higher-end finishes: $100–$200+ per sq ft in some markets.
Finished Attic Cost Drivers
- Floor reinforcement/engineer work
- New stair construction and structural openings
- Adding plumbing (bathroom), a significant cost jump
- Ductwork or HVAC upgrades vs mini-split choice
- Window/dormer construction for egress and light
- Finishes: flooring, built-ins, fixtures
| Scope | Typical cost per sq ft | Notes |
| Storage & insulation only | $5–$20 | Minimal finishes |
| Basic living finish (no bath) | $30–$60 | Drywall, basic floors, HVAC mini-split |
| Mid-range living (bath + dormer) | $60–$120 | Adds plumbing, better finishes |
| High-end conversion | $120–$250+ | Custom built-ins, full bath, skylights |
How Long Does It Take For a Finished Attic?
- For Design & permits, 2–8 weeks (depends on municipality)
- Structural/infrastructure takes 1–3 weeks
- HVAC/electrical/plumbing requires 1–2 weeks
- Insulation/drywall/finish takes 2–5 weeks
- And trim & punch can take 1–2 weeks
Total: 6–14 weeks. Complex structural changes, dormers, or major plumbing can extend schedules. A clean permit-ready set shortens permit review and contractor guesswork, and that saves time and money.
Common Mistakes Related to Finished Attic & How Drafters Stop Them
Typical mistakes:
- Skipping structural checks and undersizing reinforcement.
Fix: Require the engineer’s sign-off on the drafting package.
- Designing without egress plans.
Fix: Show window/ladder/stair on plans and mark clearances.
- Ignoring ventilation and insulation interactions.
Fix: Specify vented vs conditioned assembly in detail.
- Not checking service panel capacity.
Fix: Include electrical load calculations in the plans.
- Poor stair placement that ruins the downstairs layout.
Fix: Model stair impacts in 3D and show alternate options.
A professional drafter avoids rework by producing permit-ready, coordinated 2D and 3D documents that call out structural notes, service coordination, and inspection items.
Draft A Finished Attic: DIY vs Professional
If you’re comfortable with framing, local code, and electrical, a partial DIY for finishes might be okay. But hire pros for:
- Structural reinforcement and engineer calculations
- Stair construction and egress compliance
- Major HVAC, plumbing, or panel upgrades
- Permit drawings and code compliance
Drafters help you save money even on DIY builds: accurate as-builts reduce material waste and prevent costly rework.
Finished Attic ROI & House Resale Value
Attic conversions can add noticeable value, but returns vary. In some markets, a well-executed conversion increases property value by 10–25% or more, depending on local demand and finish quality. Urban areas with high space demand often capture the best premium. Remember: Buyer tastes matter, as a poorly built attic can be a negative design for market expectations.
Checklist & Permit-Ready Finished Attic Elements
| Item | Why it matters |
| As-built measurements & photos | Prevents surprises |
| Structural notes & engineer letter (if needed) | For proper reinforcement |
| Stair and egress plan | Code check for safety |
| HVAC plan: ducting or mini-split | Comfort and permitting |
| Electrical load calc & panel check | Avoid overloading the service |
| Insulation & ventilation strategy (R-values) | Energy code & comfort |
| Window/dormer specs (egress) | Permit and resale value |
| Finish schedule (floor, paint, trims) | Client expectations |
| Energy compliance forms | Local code paperwork |
| Fire/smoke detection notes | Final inspection items |
Finished Attic Cost Analysis
Let’s break the budget into buckets, so you actually know where money goes.
| Items | Cost | Details |
| Structure & framing reinforcement | 15–30% of the project cost | If joists are inadequate, you’ll likely pay for sistering or new beams and possibly new posts to the foundation. |
| Stair & access work | 5–15% | A full stair is costly because it affects other floors. |
| HVAC & electrical | 10–25% | Depends on whether you add a mini-split (lower) or extend ducted HVAC + panel work (higher). |
| Windows/dormers | 10–20% | Dormers are expensive but massively increase usable area and light. |
| Finishes & built-ins | 20–40% | Floors, drywall, trim, paint, and custom storage. |
Pro tip: The single biggest variable is structural and new stairs/dormers. Budget for them first.
How CAD Drafters Fit Into Every Step Of the Finished Attic
You’re a contractor, architect, or designer, and your time is money. What you want from a drafter:
- Fast, accurate as-builts so you bid right.
- Permit-ready 2D plans and 3D models that reduce permitting friction.
- Structural coordination notes and clear callouts for engineers.
- Electrical load calculations and HVAC routing.
- Clash detection (if using BIM) so trades don’t fight in the attic crawl.
- Same-day or 48–72h turnaround on urgent sketches for field decisions.
A coordinated drafting partner removes guesswork and lowers on-site surprises. That saves change orders and schedule delays.
Finished Attic Pre-Drafting Checklist
- Measure floor joist spacing and depth.
- Note the roof pitch, rafters, and any visible water damage.
- Locate existing HVAC, electrical runs, and plumbing vents.
- Photograph potential stair locations.
- Measure window rough openings and dormers.
- Check attic venting and insulation depth.
- Record service panel capacity and meter info.
Finished Attic Post-Drafting Checklist
- Field-measure and document the existing condition
- Hire an engineer if joists/stairs/dormers are involved
- Produce permit-ready plans (2D + 3D recommended)
- Confirm energy/insulation strategy and ventilation
- Plan HVAC/electrical/plumbing routing before framing
- Submit to the permit office with clear structural notes
Conclusion
You want the job to run clean: no surprises, no rework, no inspector issues. That’s exactly where a good drafting partner saves your time and money.
Here’s what contractors, architects, and subs told us keeps them up at night when converting attics:
- Will my joists hold up after I put a bedroom up there?
- The inspector rejected our stair plan, and now we’re behind.
- Ductwork clashes with a beam, and the HVAC guy wants a tear-out.
- We lost time while waiting for the corrected permit drawings.
So, the pain is poor documentation and late coordination.
Discover how a finished attic can transform your home read the complete guide.
The Role of CAD Drafters
- Fast, accurate as-built drafting so your bid is real (48–72 hours typical for small sets).
- Permit-ready 2D plans and 3D views so inspectors and clients say yes the first time.
- Structural coordination packages and engineer-ready details to avoid rework.
- BIM clash checks for HVAC/electrical so trades don’t collide in a tiny attic.
- Retainers for priority jobs and quick turnaround on emergency field sketches.
- Secure file transfer, NDAs, and a peer-review sign-off before we send final drawings.
If you want a conversion that’s smooth from permit to punch list, we’ll make the drawings and models that keep everyone aligned.
Want a sample scope or a quick as-built checklist best for permits? Click below, and we’ll put together a permit-ready draft set tailored to your job.
Get a permit-ready attic draft from CAD Drafters. Request a quote now!
FAQs
What minimum ceiling height do I need to call it habitable?
Codes vary, but many rules require at least 7 ft over a certain percentage of usable floor; there are exceptions around beams and slopes. Therefore, you must always check local code early.
Do I always need an engineer?
Yes, if you’re adding bedrooms, a stair, a dormer, or expecting to change structural members. At a minimum, get an engineer’s sign-off on floor reinforcement.
Can I skip permits if it’s just finishing?
No. Most jurisdictions require permits for converting an attic into habitable space (framing, electrical, plumbing, and HVAC changes). Permits protect you and future owners.
How much does it increase my home insurance?
Conversions can change replacement cost and may increase premiums. Notify your insurer before work starts and get new valuations.
Is a mini-split a good HVAC choice?
Often yes: minisplits provide zoned comfort, low ductwork, and quick installs. For larger attics or whole-house balance, ducted HVAC may be better.
What insulation R-value should I target?
R-30 to R-49 for attic ceilings is common; walls R-13–R-23. Local climate changes the numbers, so match local code and energy guidance.
Will finishing the attic fix my ice dams?
Not automatically. Ice dams are caused by heat loss and blocked ventilation. Proper air sealing and continuous venting, plus sufficient insulation, reduce the risk.
How long will inspections take?
Field inspections happen after rough and final phases. Permit office review times vary, from days to months, depending on the town. Submit complete plans to shorten reviews.
What are smart ways to get usable area from slopes?
Use built-in storage under knee walls, low bookshelves, and platforms for beds. Dormers also add real headroom and daylight.
How do I prove the space is legal at the sale time?
Keep permits and final CO paperwork. If conversions weren’t permitted, get them retroactively permitted or be transparent in sale disclosures.
Is adding a bathroom in the attic worth it?
It’s expensive (plumbing and venting costs), but it adds convenience and resale appeal: factor sewer/stack routing and structural support.
What’s the simplest path to heat/cool an attic without major updates?
A ductless mini-split often gives comfort quickly with minimal structural impact.