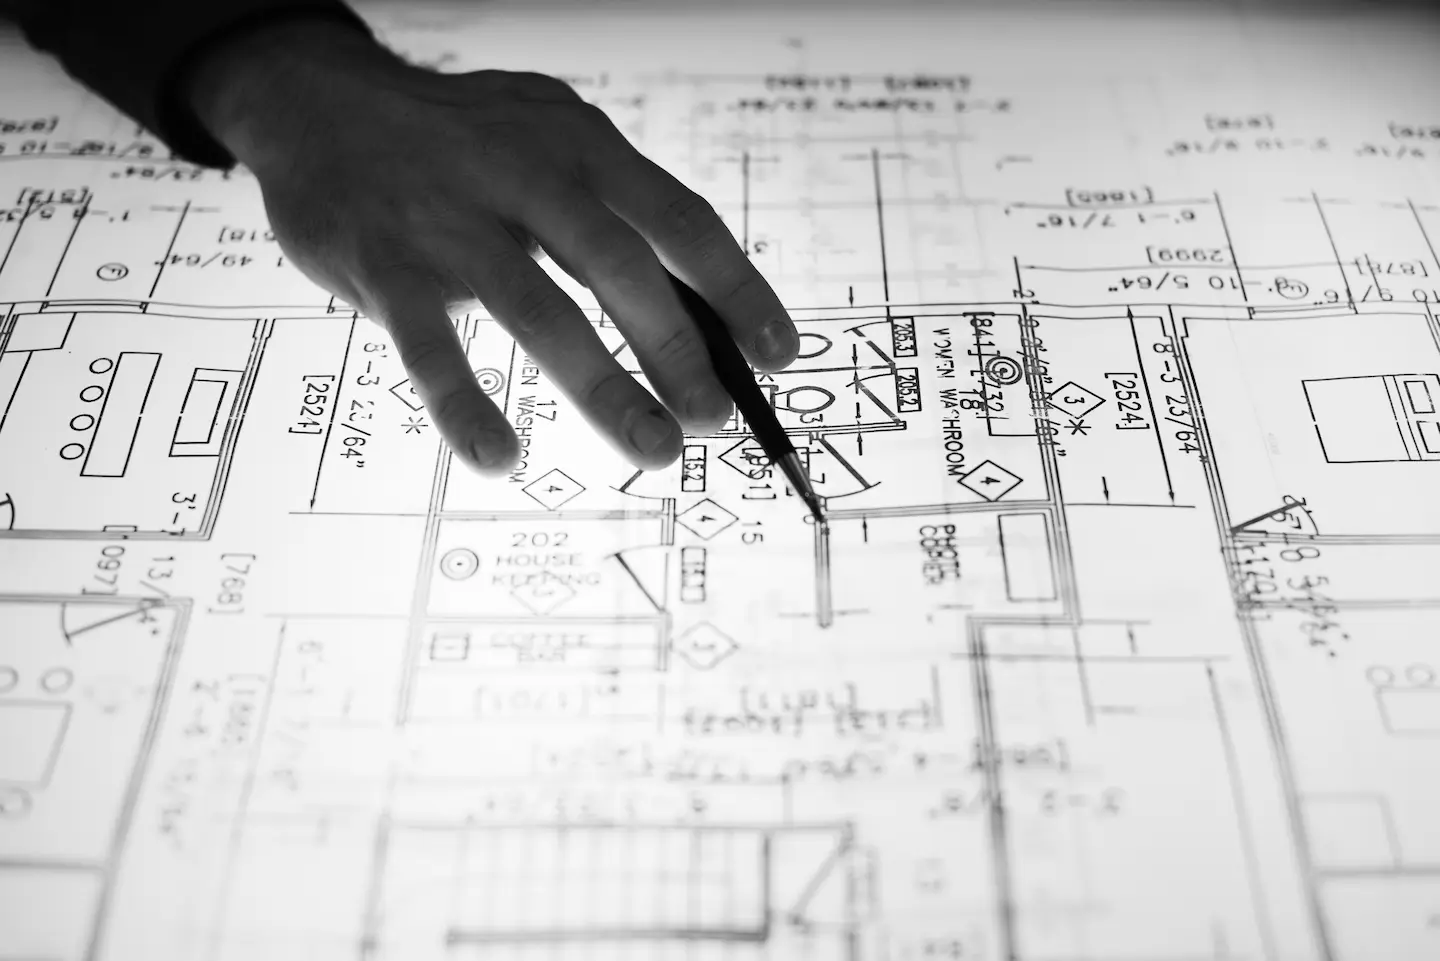
Are you worried due to confusing sketches, shifting scope, and pricing that never matches reality at the construction site? In design-build work, early issues can lead to RFIs and change orders. You might also feel pressure to go faster while decisions stay undocumented. Meanwhile, your superintendent watches laborers wait while the design answers basic questions. That combination keeps estimators guessing and pushes risk onto the field team.
It is where schematic design and design development change the game. They turn ideas into coordinated, buildable direction. Using them, you can align owners, designers, and builders, eliminating schedule pressure. Furthermore, they sort the architectural design process into decision gates you can actually manage. You get clearer layouts, early system choices, and tighter cost conversations. Keep reading, and let’s explore how each phase plays the role!
What is Schematic Design?
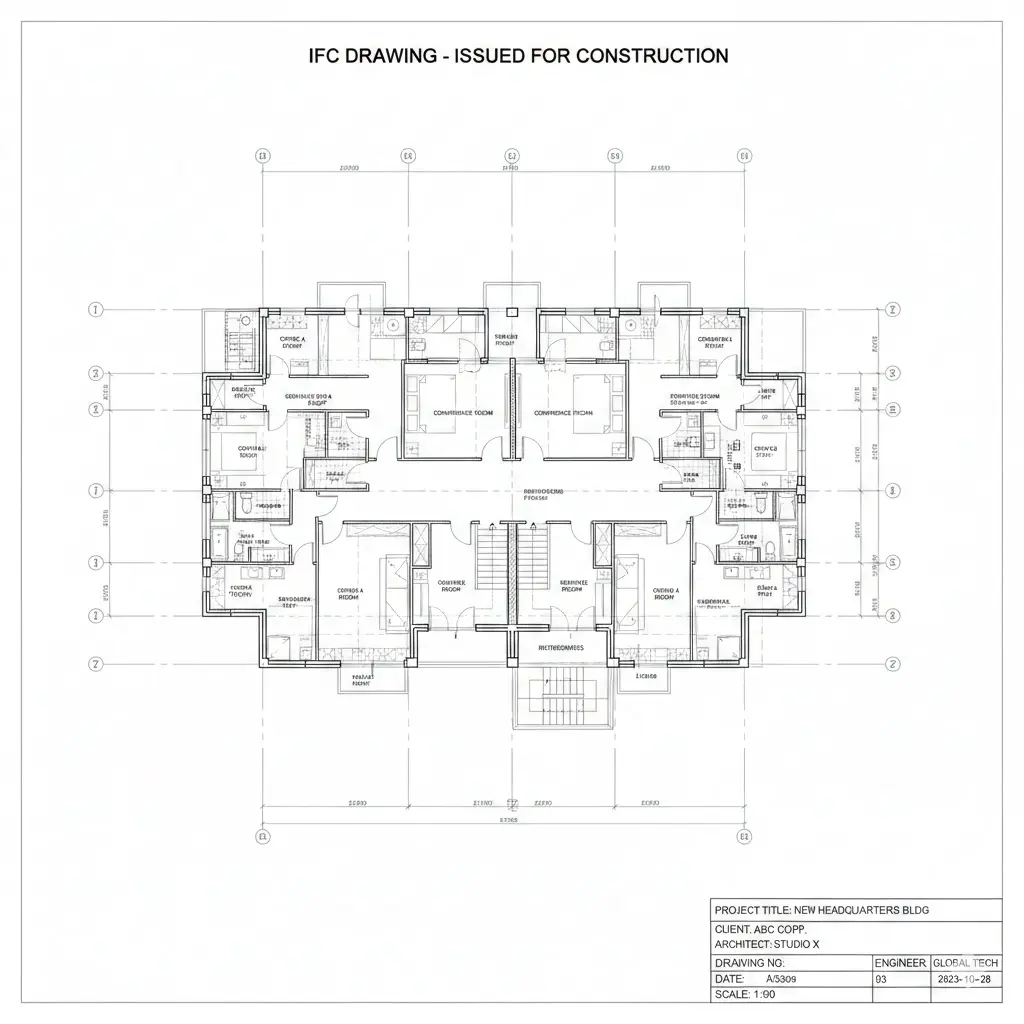
Schematic design translates project requirements into a workable building concept. It focuses on scale, relationships, and major component placement, and not final detailing. Architects normally present a preliminary design, then develop an owner-approved schematic package. That package may include study models, sketches, or simple digital representations.
What is the Role of Schematic Design In Construction?
Schematic design documents show the project’s components and their relationships at scale. Similarly, they demarcate building areas and volumes, so the program starts matching drawings. Teams usually fix an early structural grid and typical exterior modules at this point. They also define structural and MEP systems enough to support early coordination.
Furthermore, it supports early pricing and smarter procurement conversations. In other words, schematic sets often trigger a first meaningful estimate of the cost of work. That estimate works best when the team documents key assumptions and alternates. In design or build delivery, overlapping design and construction makes this clarity even more valuable.
Step-By-Step Schematic Design Process
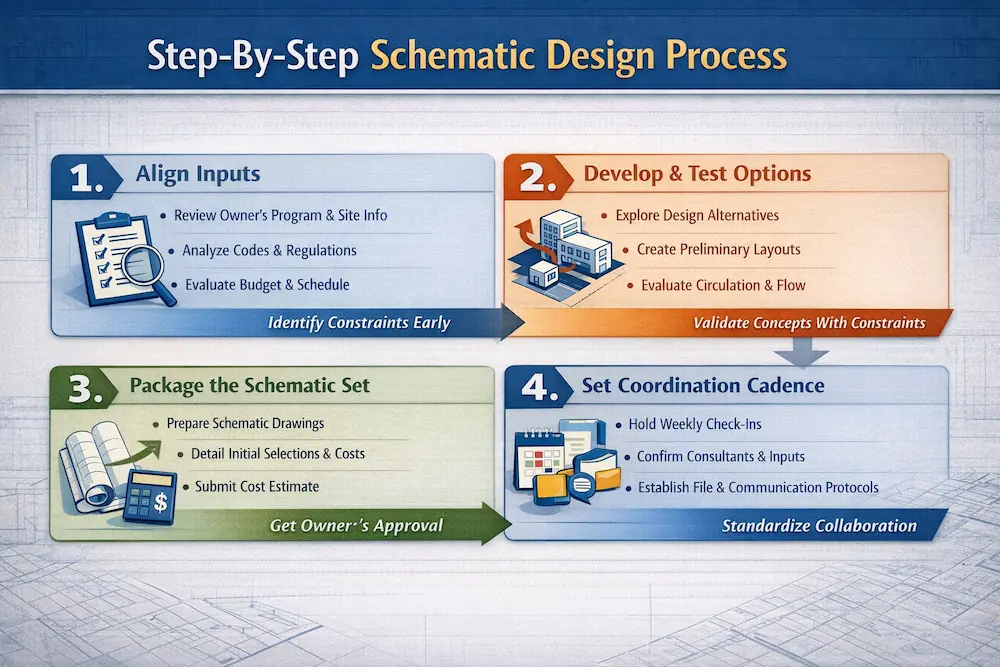
1. Align Inputs
First, the architect reviews the owner’s program and initial project information. Next, the team reviews applicable laws, codes, and regulations impacting the design. Then, they evaluate the budget, schedule, site constraints, and delivery method together. They highlight inconsistencies early, instead of burying them in later revisions.
2. Develop & Test Options with Constraints
Then, the architect discusses alternative approaches to design and construction with owners. Next, the team prepares a preliminary design showing scale and component relationships. They pressure-test circulation, egress, and service zones while changes stay inexpensive. Finally, the owner approves a direction that moves forward into schematics.
3. Package the Schematic Set
After approval, the architect prepares schematic design documents for the owner’s sign-off. The team notes initial system and material selections right on the drawings. Then, they submit an estimate of the cost of work to keep the scope honest. Last, the owner reviews the package and authorizes the next phase.
4. Set Coordination Cadence and Drawing Standards Early
Start weekly check-ins and capture decisions while the files stay lightweight. Next, finalize key consultants and confirm how they will deliver schematic inputs. Then, set a communication protocol and file structure that everyone actually follows.
Note: Build a mock-up sheet set and drawing index, so later phases stay organized.
For a deeper understanding of how architectural drawings communicate these early design concepts, read our guide on Architectural Drawings
Mistakes in Schematic Design and How to Avoid Them
● Treating Schematics Just Like a Picture
If you ignore scale and dimensions, pricing becomes a rumor, and not a plan. Instead, insist on a representative plan area with key dimensions and grid logic. You can also request a wall section that shows heights and distribution zones. Those basics are listed as schematic quality objectives for teams.
● Skipping Early Code, Access, and Utilities Reality Checks
Teams sometimes postpone zoning, code, and accessibility review until late design. That delay can force layout resets when AHJ comments finally arrive. You should avoid it by building a simple code checklist and updating it every week. Remember that schematic checklists call for early code, accessibility, and utility coordination work.
● Leaving Trade Input on Future
Design-build works best when trade partners join while options still exist. Bring key trades in early to validate clearances, routing, and phasing constraints. That input reduces rework and improves confidence in early estimates and packages.
What is Next to Schematic Design?
In the traditional architectural design phases, design development follows schematic design.
To better understand how detailed technical drawings communicate scale and dimensions, read our guide on Section Drawing
What is Design Development?
Design development documents develop the approved schematic design into coordinated information. They include plans, sections, elevations, and typical construction details with clearer intent. Furthermore, they include diagrammatic layouts of building systems across key disciplines. Additionally, they add outline specifications that establish major material and system quality levels.
What is the Role of Design Development In Construction?
It makes the project priceable at a trade level. Design development drawings often support a trade breakdown style cost estimate. That estimate gives builders clearer quantities and scope boundaries than schematic pricing. It also helps teams plan procurement for long-lead systems with fewer surprises. Simply put, design development is a major milestone toward construction documents.
Furthermore, it reduces coordination pain before it reaches the field. Design development forces the team to locate risers, chases, and interstitial zones. It also pushes reflected ceiling plans and device layouts into coordinated geometry. When you resolve those clashes on paper, you avoid conflicting labor in the field.
Key Elements of Design Development
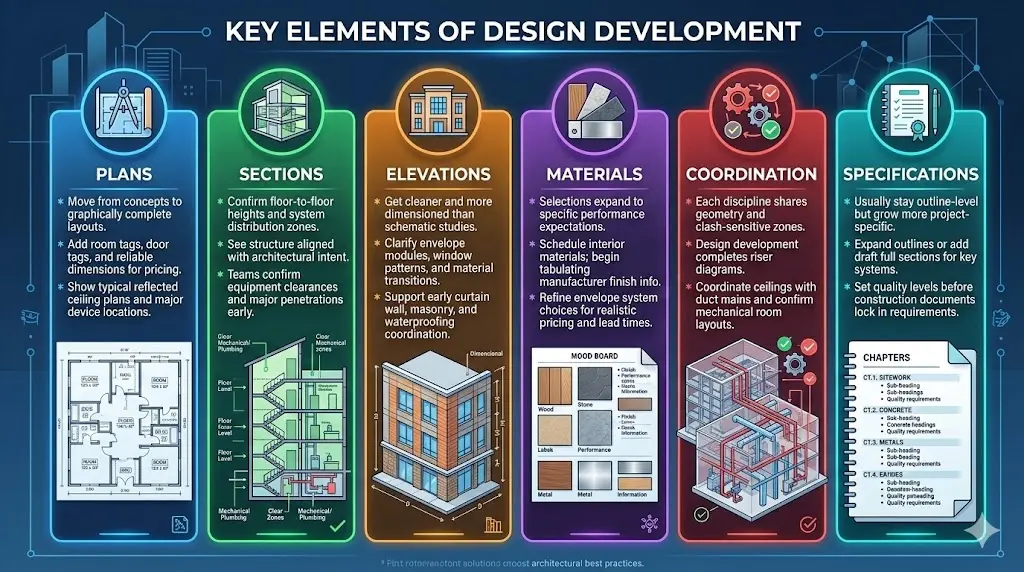
● Plans
Plans in design development move from concept to graphically complete floor layouts. They add room tags, door tags, and more reliable dimensions for pricing. Furthermore, they show typical reflected ceiling plans and major device locations.
● Sections
Sections in design development confirm floor-to-floor heights and system distribution zones. In them, you can also see how the structure aligns with the architectural intent across the building. Teams use sections to confirm equipment clearances and major penetrations early.
● Elevations
Elevations in design development get cleaner and more dimensioned than schematic studies. Using them, you can clarify envelope modules, window patterns, and exterior material transitions. That clarity supports early curtain wall, masonry, and waterproofing coordination.
● Materials
Material selections expand beyond generic finishes into specific performance expectations. Teams schedule interior materials and begin tabulating manufacturer-level finish information. Moreover, they refine envelope system choices to support realistic pricing and lead times.
● Coordination
Coordination means each discipline shares the same geometry and clash-sensitive zones. Design development often completes riser diagrams and coordinates ceilings with duct mains. It also confirms mechanical room layouts so equipment fits without last-minute demolition.
● Specifications
Specifications in design development usually stay outline-level but grow more project-specific. Teams often expand outlines or add draft full sections for key systems. This step sets quality levels before construction documents lock in every requirement.
Learn how these drawings fit within the overall documentation process in our guide to Architectural Drafting
Step-By-Step Design Development Process
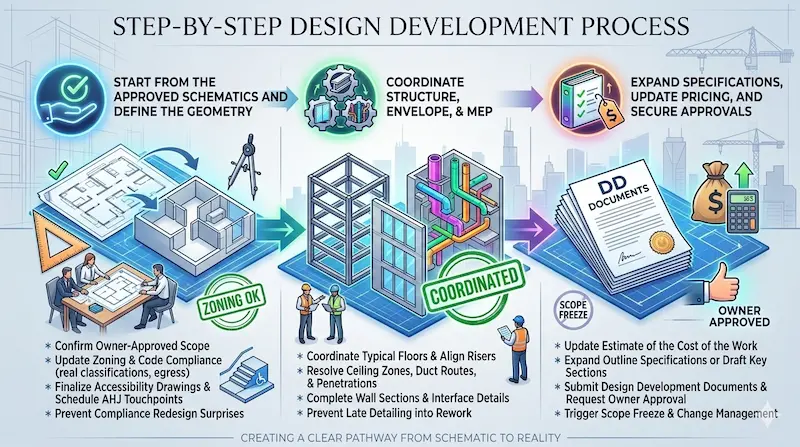
1. Start from the Approved Schematics and Define the Geometry
First, the team confirms what the owner approved and what must stay fixed. Next, they update zoning and code compliance sheets with real classifications and egress. Then, they finalize accessibility drawings and schedule AHJ touchpoints as needed. This step prevents surprise compliance redesign during construction documents and late permitting.
2. Coordinate Structure, Envelope, & MEP
Then, architects and engineers coordinate typical floors until risers and chases align. Next, they resolve ceiling zones, major duct routes, and structural penetrations together. Furthermore, they complete typical wall sections and begin interface details at critical transitions. This coordination rhythm prevents later detailing from turning into expensive rework.
3. Expand Specifications, Update Pricing, and Secure Approvals
After coordination, the team updates the estimate of the cost of the work. They expand outline specifications or draft key specification sections for pricing. Then, they submit design development documents and request owner approval to proceed. That approval should trigger a clear scope freeze and change-management process.
Mistakes in Design Development Phase and How to Avoid Them
● Locking a GMP Early
Some teams chase an early Guaranteed Maximum Price (GMP) before coordination reaches design development maturity. That move often forces contingency padding or awkward scope carve-outs later. You must avoid it by tying pricing milestones to deliverable completeness, not calendar dates.
● Coordination Issues
If you leave risers, chases, and ceiling zones undocumented, clashes become field work. Instead, require diagrammatic system layouts and coordinated reflected ceiling sections early. Also, confirm mechanical room footprints and service clearances before equipment submittals.
● Ignoring the Materials Performance
Teams sometimes pick finishes without confirming durability, maintenance, and availability realities. You must fix that by documenting performance criteria and stating quality levels in outline specs. Then, confirm envelope and roofing assemblies early, because interfaces drive risk.
To understand how cost estimation ties into early design phases, read our guide on What Is a Takeoff in Construction
Best Practices for Successful Schematic and Design Development Phases
● Run Decisions Perfectly
First, keep a one-page decision log with dates, owners, and cost impacts. Next, tie every plan revision to a pricing update, even if it’s rough. Then, hold short weekly alignment meetings with design and construction leads.
● Build Trust through Transparency & Early Collaboration
Design-build teams succeed when members communicate openly and document expectations. DBIA frames successful design-build as an integrated, collaborative team built on trust. So, share assumptions early, including allowances, exclusions, and code interpretation risks. This way, you can avoid significant issues.
● Use Clear Approval Hold Points
Tie approved to a specific deliverable list, avoiding a confusing email reply. If you start early release work, define scope, cost basis, and design assumptions. Then, roll that work into the final contract sum, so accounting stays clean. Simply put, lock the drawings you estimated, and manage changes through one controlled path.
● Use Consistent Drafting Standards
Use consistent layers, view titles, and sheet organization across every phase deliverable. Similarly, push for clean CAD backgrounds so coordination overlays do not drift. Then, publish a drawing index early and keep it stable through design development.
Need expert support during schematic and design development?
Commonly Asked Questions
What are the total design phases in construction?
The following are the total design phases in construction:
- Schematic Design (SD)
- Design Development (DD)
- Construction Documents (CD)
- Bidding or Negotiation
- Construction Administration
What is the difference between concept design and schematic design?
Concept design uses bubble diagrams, mood boards, and massing studies to test direction fast. However, the schematic design phase converts that direction into scaled plans, sections, and early system choices.
What is the difference between schematic design and design development?
Schematic design mainly supports internal alignment, and then the owner chooses a direction. On the other hand, design development often supports external approvals, like boards, lenders, or early permit reviews.
What is included in schematic design documents?
A schematic design document includes:
- Summary of the project
- Site and code analysis
- Old and new site plans
- Floor plans for all levels
- Multiple building sections
- Building elevations
- Structural schematic drawings
- Mechanical schematic drawings
- Electrical schematic drawings
- Plumbing schematic drawings
What is included in design development documents?
This includes:
- Detailed architectural drawings
- Refined building sections and elevations
- Structural drawings
- MEP systems diagrams
- Outline specifications
- Project schedules
- Coordination documents
- Code compliance checks
Can you make changes in the schematic design once it is done?
Yes, you can. Adjustments are possible in later stages of schematic design. But remember that this will add cost to your project budget; therefore, it is better to resolve issues or make changes early.
What are the key elements of a construction drawing?
These elements are also the fundamentals of visual design: Shape, color, space, texture, line, form, and value.
What role does schematic design play in risk management?
Using schematic designs, you can identify issues with regulations, budget and system technicalities. You test assumptions early, address issues on time, and hence, save time and cost of your project, professionally mitigating risk.
Conclusion
Schematic design sets direction, while design development makes that direction buildable. When you treat both phases as pricing and coordination tools, the field calms down. You also protect the owner’s budget by making the scope visible before contracts harden. That’s how a design-build team earns speed without gambling on unknowns.
The Role of CAD Drafters In Construction Designing and Drafting
CAD Drafters translate your schematic and design development decisions into clean, consistent CAD sheets. We support contractors with background cleanup, dimension control, and trade-ready plan sets. Our team also helps architects standardize layers, details, and schedules across disciplines. If you need drafting support for your next design-build package, let’s talk!